
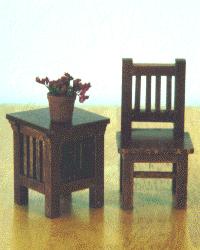
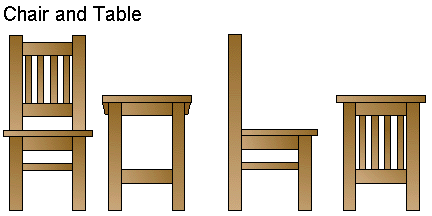
Mission Style Chair and Side Table
Overall dimensions:
- Chair: 1 3/4" wide, 1 3/4" deep, 3 1/4" high
- Table: 1 3/4" wide, 1 3/4" deep, 2 1/8" high
Chair Assembly Instructions:
Cut out all pieces of wood.
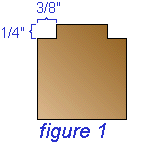 Trim the back corners of the seat to accomodate the chair back. (See figure 1.)
Sand all of the pieces of wood. Stain all the pieces of wood. Let dry. Sand again, with very fine sandpaper.
Back and Front:
Glue the spindles between the horizontal back pieces as indicated in figure 3. Be sure to center the spindles so that they are located 1/16-inch from the front and back edges of the horizontal pieces.
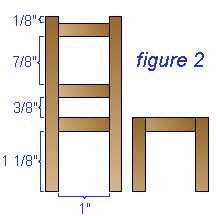 Glue the horizontal back pieces and the seat supports between the legs, positioning them as indicated in figure 2.
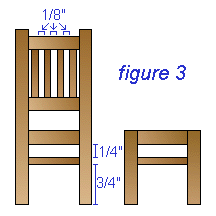 Glue the rungs between the chair legs, positioning them as indicated in figure 3. The chair rungs should be centered on the legs so that the the rungs are 1/16-inch from the fronts and backs of the legs.
 Sides:
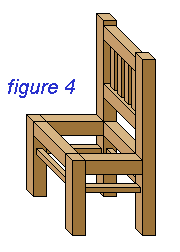
Glue the side seat supports and side rungs between the legs, keeping them at the same elevation as the supports and rungs on the front and back. (figure 4)
Finishing:
Glue the seat to the seat supports, keeping the back edge of the seat even with the back of the chair.
Sand the bottom of the legs, if necessary, so that the chair is level and and does not wobble.
Reapply stain to sanded parts, if necessary.
Varnish the wood, or use your favorite method of finishing the wood.
Side Table Assembly Instructions:
Sides:
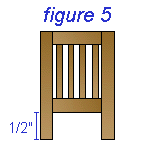
Glue the spindles between the support pieces, positioning them as indicated in figure 5. The spindles should be centered on the support pieces.
Glue two support pieces between two legs, positioning them as indicated in figure 5.
Repeat for the other side.
Front, Back, and Shelf:
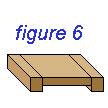 Glue two supports to two edges of the shelf, as indicated in figure 6. Keep the top edges flush.
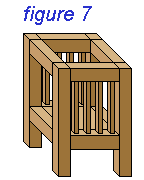 Glue one edge of the shelf assembly to one side piece, keeping the shelf at right angles to the side. (figure 7).
Glue the other side assembly to the other side of the shelf, and glue the remaining support pieces between the legs, keeping the top edges flush. (figure 7).
Finishing:
Glue the top to the supports, keeping the top centered.
Install the decorative brackets by gluing the crown mouldings to the sides of the legs, under the top of the table.
Sand the bottom of the legs, if necessary, so that the table is level and and does not wobble.
Reapply stain to sanded parts, if necessary.
Varnish the wood, or use your favorite method of finishing the wood.
From Alice's Dollhouse pages