
Roofing - fixing underfelt.
Safety: Working on a roof involves working at height , so always use scaffolding or other stable platform, never use just ladders (even on a bungalow).
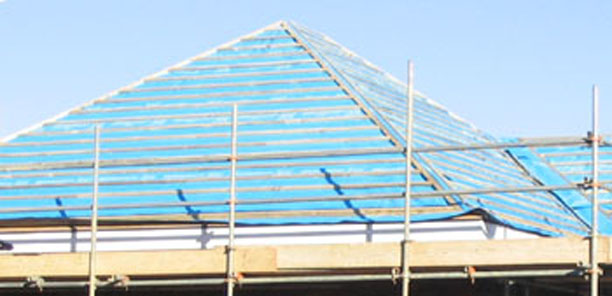 Once the old roof covering
has been removed and any required repairs made to the roof timbers, or, for a new roof, the new roof timbers have been completed,
the first steps in fitting the roof covering are to fix the roofing felt and the wooden battens for fixing the roof tiles/slates.
(Note: in Scotland, the roof needs to be boarded and counter battens fixed before the underfelt is fitted.)
Once the old roof covering
has been removed and any required repairs made to the roof timbers, or, for a new roof, the new roof timbers have been completed,
the first steps in fitting the roof covering are to fix the roofing felt and the wooden battens for fixing the roof tiles/slates.
(Note: in Scotland, the roof needs to be boarded and counter battens fixed before the underfelt is fitted.)
Even new underfelt may be damaged in strong winds, so it is best to wait until fixing the battens and the roof covering can follow quickly in reasonably calm weather.
Underfelt
The underfelt provides an extra waterproof barrier for any moisture which gets under the roof covering and also a layer of insulation. Traditional bitumen underfelt is readily available and is the cheapest option - this differs from 'flat roofing felt' in that it has a stronger woven base. However, over the years the traditional bitumen felt will become brittle and rot into the eve guttering where it is exposed to sunlight. Modern alternative underfelts are available, these are usually lighter (so easier to work with) and definitely more durable.
The basics of fitting
The underfelt is held in place on the rafters first by nailing direct to them and then by nailing through the wooden battens which are used for fixing the slates or for locating the nibs on the back of tiles.
The fascia board of most roofs stands above the level of the rafters, if felt is laid across this space, there will be a tendency over time for the felt to sag behind the fascia allowing water to collect, this may cause the felt to rot and lead to dampness on the soffit or the wall below. To prevent this sagging, fit either wooden wedges to each rafter, or nail narrow strips of sheet material (such as exterior grade plywood) across the gaps between the rafters and the top of the fascia (see diagram below) - either method will support the underfelt and allow water to exit over the top of the fascia.
Fitting the felt
Start at the bottom of the roof slope, run the felt along the roof edge allowing it to overhang the fascia so that the lower edge of the felt extents far enough to reach the middle of the gutter. Start at one end of the roof run, secure the felt to every other rafter using galvanised 25mm (1 inch) clout nails, put a nail in the middle of the width of the felt, and about 250mm (10 inches) in from the fascia (do not nail the the top edge of the felt). Work along the roof pulling the felt as you go to take out any excess slack in the felt, a slight sag between rafters is ideal as it will allow any water to drain down under the tiles/slates.
When the first strip of felt has been laid, lay the next strip of felt on above the first so that its lower edge overlaps by at least 100mm (4 inches) - where one roll ends, and the next one is starts, horizontal overlaps should be at least 150mm (6 inches). Fix the second strip of underfelt to the rafters in the same manner as the first, position the lower nails about 50mm (2 inches) from the edge so that it secures both this strip and the previously one.
Repeat this sequence with further strips of felt working up to the top of the roof.
- At the ridge, fold the underfelt over the top of the ridge and down the other side by at least 150mm (6 inches). When laying the top run of felt on the second side of the pitched roof, take the felt over the felt from the first side and nail it through to the top of the rafters on the first side.
- At a verge (the gable at the end of a roof), lay the underfelt about half way across the outer wall skin, or, if an overhanging verge, the outer rafter.
- Where the roof abuts to a wall, either at the side or top, trim the underfelt to allow about 50mm (2 inches) onto the wall - this will be sealed later by flashing.
- At a hip, take the underlay from the first side around the corner, and overlap from the second side by at least 150mm (6 inches). Make sure that all folds are done so that no pockets are left where water could collect.
See fixing battens.