
Repairing small areas of plaster
Small cracks often appear in plaster walls and ceilings, usually these are nothing to worry about but it is always worth knowing the signs which may indicate something serious and when professional advice should be sort.
For cracks in walls the cracks are generally:
- Small (up to 2mm) cracks taking random directions, these are probably just 'drying out' cracks and do not usually indicate any problems with the basic structure.
- Cracks which go in definite horizontal or vertical straight lines, or which go in a stepped pattern could indicate something more serious and a professional assessment should be obtained.
- Any long cracks wider than about 3 mm, or where something thin can be pushed deep into the crack may again suggest professional assessment is obtained.
In some older properties, the joints of plasterboard used for ceilings was sometimes not 'taped' before they were skimmed with plaster and this can lead to cracks where adjacent sheets meet. These cracks can often look quite bad as they can cover quite large areas. These cracks are not usually structural and can be hard to cover.
Most small cracks will easily be covered by normal wallpaper but when walls or ceilings are to be painted with ordinary paint, the cracks will need to be filled before painting and this article deals with filling small cracks for this purpose.
Repairing cracks
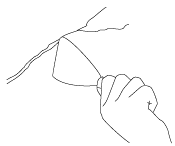 Small cracks in plaster should first be widened so that filler can be pushed right in and has something to key on to. The corner of a scraper or filling knife is ideal for removing any loose plaster and for opening up and deepening the crack. Try to undercut the crack with the corner of the scraper to give a better key for the filler.
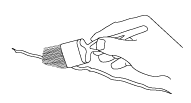 Using a dry paint brush brush along the line of the crack to remove any loose dust and dirt.
Mix a quantity of filler as per the manufacturer's instructions and before applying it, dampen (but don't soak) the inside of the crack using a small paint brush dipped in clean water.
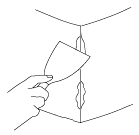
 Use a filling knife to apply the filler along the line of the crack and press the filler into it - leave the filler proud of the surrounding surface.
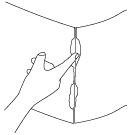
Dip a clean filling knife in clean water and run it along the line of the crack to level the filler to the surface around it.
Fillers for this type of work usually shrink as they harden, and so after the filler has hardened, the filler within the crack may need to be built up using a number of applications. Between each application of filler, the surrounding surface should be lightly sanded and moistened before applying the next application.
Repairing chipped plaster corners
The modern technique for plastering external corners usually incorporates a metal corner strip which generally protects then from damage. However, in older properties external plastered corners were often just render and plaster and the corners can be chipped away by knocks and scrapes. Repairing such damage can be easily be carried out using a suitable plaster filler.
Start by brushing the area of damage to clean off any loose dust and dirt.
Use a moistened paint brush or water spray to dampen the area of damage (but don't soak the plaster).
 Using a wide bladed filler knife, apply some filler to the damaged area, work the filler into the damage and make sure that there are no voids in the filler being applied.
Run the filler knife up and down the surrounding plaster on both sides of the corner to get the filler level with the sides.
 When the filler begins to harden, use a wet finger to form the corner of the repaired area to the profile above and below - external corners are rarely sharp edged, often they are slightly rounded.
The filler used in the repair may shrink as it hardens, so the surface of the repair may need to be built up using several applications of filler. Between each application, lightly sand the area of the repair and the surrounding surface and moisten the surface before applying some more filler.